
In today’s fast-paced digital world, speed is everything. We’ve all heard the statistics: a single-second delay in page load time can lead to a significant drop in conversions, page views, and customer satisfaction. While optimizing images and minifying code are important steps, one of the most powerful — and most overlooked — performance techniques is browser caching.
If Google PageSpeed Insights, GTmetrix, or Pingdom is flagging a warning that says “Leverage Browser Caching” or “Serve static assets with an efficient cache policy,” this guide is for you.
Here’s a deep dive into how browser caching works in WordPress and how you can enable it in a single click.
What Is Browser Caching?
Every time someone visits your website, their browser has to download a set of files to display the page correctly — stylesheets (CSS), JavaScript files, images, fonts, and more. Without caching, every single visit, even from the same returning user, re-downloads all of those files from your server from scratch.
Browser caching solves this by telling the visitor’s browser: “You don’t need to download this file again for the next month — or year. Just keep a local copy and use that.”
The result is faster page loads, lower server load, and a dramatically better user experience for anyone who has visited your site before.
How Browser Caching Actually Works
Browser caching works through HTTP response headers. When your server sends a file to a browser, it attaches special instructions that tell the browser how long to store that file locally. The two most important headers are:
Expires Header: Sets a specific date and time after which the browser should re-fetch the file. For example: Expires: Thu, 01 Aug 2027 00:00:00 GMT
Cache-Control Header: A more flexible approach that sets a maximum age in seconds. For example: Cache-Control: max-age=31536000 (which equals one full year).
When a returning visitor loads your site, the browser first checks its local cache. If the file is still “fresh” — that is, within the expiry window — the browser serves it instantly from local storage without making any server request at all. This is why browser caching can shave multiple seconds off load times for repeat visitors.
The Apache .htaccess Method for WordPress
On Apache web servers — the most common hosting environment for WordPress — browser caching rules are written to your site’s .htaccess file. This configuration file sits in your WordPress root directory and controls how the server handles incoming requests.
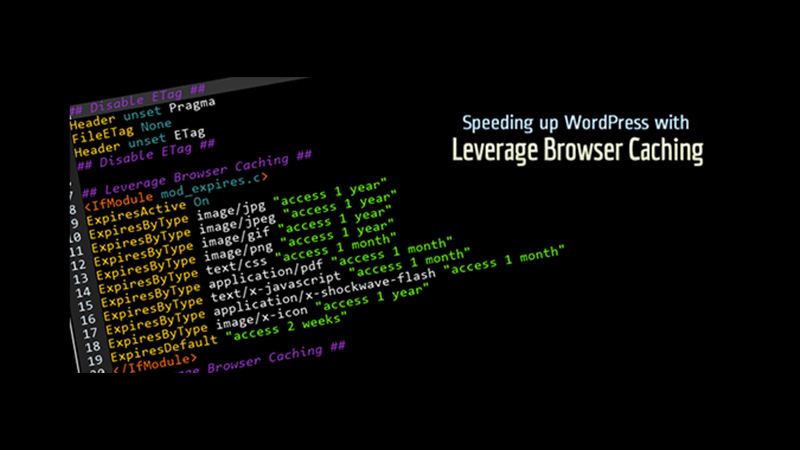
A typical set of browser caching rules uses Apache’s mod_expires module and looks like this:
<IfModule mod_expires.c>
  ExpiresActive On
  ExpiresByType image/jpeg "access plus 1 year"
  ExpiresByType image/png  "access plus 1 year"
  ExpiresByType text/css   "access plus 1 month"
  ExpiresByType application/javascript "access plus 1 month"
</IfModule>
Writing and maintaining these rules manually is error-prone — a single typo can break your entire site. This is exactly where a WordPress plugin becomes invaluable.
How Long Should Each File Type Be Cached?
Not all files age the same way. Here are the recommended cache duration by asset type:
- Images (JPEG, PNG, GIF, WebP, AVIF, SVG, ICO) — 1 Year
- Web Fonts (WOFF, WOFF2, TTF) — 1 Year
- CSS Stylesheets — 1 Month
- JavaScript Files — 1 Month
- HTML, PDF, JSON — 1 Month
Images and fonts rarely change, making a 1-year cache entirely safe. CSS and JS files are updated more frequently — such as when you update a theme or plugin — so 1 month strikes the right balance between performance and freshness.
Fix It in One Click: The Leverage Browser Caching Plugin
The easiest way to enable browser caching in WordPress is with the free Leverage Browser Caching plugin. With over 428,000 downloads and a 4.1-star rating, it is one of the most trusted performance plugins in the WordPress ecosystem.
The plugin works by writing optimized caching rules to your .htaccess file the moment you activate it — and cleanly removing them if you ever deactivate it. There is no settings page, no configuration, and no code to write.
What it covers:
- Images: JPEG, PNG, GIF, WebP, AVIF, SVG, ICO
- Web Fonts: WOFF, WOFF2, TTF
- Stylesheets: CSS
- Scripts: JavaScript
- Documents: HTML, XHTML, PDF
- Data: JSON
How to Install
- Go to Dashboard → Plugins → Add New in your WordPress admin.
- Search for Leverage Browser Caching.
- Click Install Now, then click Activate.
- That’s it — caching rules are live immediately with no further action required.
Why This Matters for PageSpeed Scores
This plugin directly resolves the browser caching warning shown by all major speed testing tools:
- Google PageSpeed Insights
- GTmetrix
- Pingdom Website Speed Test
- WebPageTest
- YSlow
Real users have reported dramatic improvements after installing the plugin. One user saw their GTmetrix score jump from an F to a B in a single step. Another saw their Leverage Browser Caching score go from F(4) to D(60) instantly — with zero configuration.
Important Limitations to Know
Before you install, there are a few things worth understanding:
Apache Servers Only
The plugin works exclusively on Apache web servers with the mod_expires module enabled. It does not work on Nginx or Windows IIS servers. If you’re on Nginx, browser caching must be configured at the server level inside nginx.conf.
Third-Party Scripts Cannot Be Cached
Files loaded from external domains — such as Google Analytics, Facebook Pixel, or ad network scripts — cannot be cached by your .htaccess rules. This is a browser security restriction. Warnings for those external resources will remain on speed tests and are completely outside your control.
A Writable .htaccess File Is Required
Your WordPress root directory must contain a writable .htaccess file. Most standard WordPress installations on shared hosting already satisfy this requirement.
How to Verify It’s Working
After activating the plugin, you can confirm the caching rules are in place by:
- Opening your
.htaccessfile via FTP or your hosting file manager. - Looking for a block that starts with
# LBROWSERCSTART Browser Caching— this is the section the plugin inserted. - Re-running your site through PageSpeed Insights or GTmetrix. The browser caching warning for files on your own domain should be fully resolved.
Conclusion
Browser caching is one of the highest-impact, lowest-effort optimizations you can make for any WordPress website. By instructing browsers to store static files locally, you eliminate redundant server requests, reduce load times for returning visitors, and boost your scores across every major performance testing tool.
The Leverage Browser Caching plugin makes this a completely hands-off process. Install it, activate it, and let it work in the background — no coding, no manual .htaccess editing, and no ongoing maintenance required.
Ready to fix your browser caching warning? Install the free Leverage Browser Caching plugin from the WordPress plugin directory today.